3D Printers
As of 2026 we have:
- Snap maker U1 (four materials)
- Bambu labs X1C, P1P, A1, A1 mini x2. I think we have 2 AMS and 2 ams lite units for using four colors.
- Prusa i3 mk3 x2
- Miscellaneous older printers
- We sold our resin printers (Form II, Elegoo Mars?) and the Markforged Mark Two
Please see our meetup page for our introduction to 3d printing/3d printer training.
The software we use is Snapmaker Orca, Orca Slicer, Bambu Studio, and PrusaSlicer.
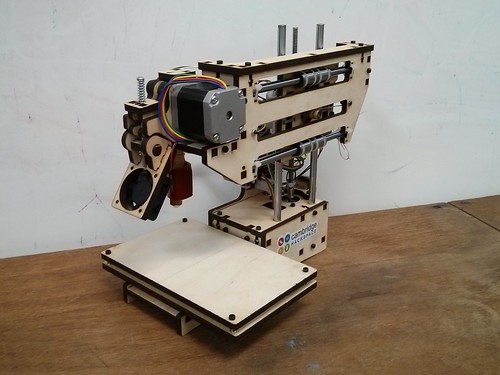
Printrbot Simple 3D printer
- Create a 3d model and export it in STL format
- Import this into Repetier Host
- Slice the models into thin slices and compute a path for printer head
- Check the created g-code for errors
- Send the g-code to the printer
Some additional tips and tricks (contact JAG for details:)
- Seal up the PLA in a bag when not in use -- if it gets too much water from the air it will get brittle
- Make sure you use the little white insert to guide the PLA into the extruder -- it helps to keep the filamenbt in the middle of the extrusion gear and ensures the best accuracy.
- Make a nice flat bed of 3M painters tape for your prints -- make sure each pass doesn't overlap
- Configure Repetier and slicer for a bed size of 100mm by 100m, nozzle width of 0.4mm, 200C
- Be careful of the Z limit switch -- the wires in the back are loose and if they get in the way the machine will not find its Z home position and lots of belt twisting will result
- The default EEPROM settings in the Marlin firmware (https://github.com/ErikZalm/Marlin) tell the printer how much steps of each motor are needed for each direction. The defaults are probably OK, but I actually use "M92 X110.00 Y110.00 Z2020.00 E98.00" (Tested with a micrometer in June 2014)
- To load PLA, the hot end must be hot. Plug in everything and click "set temperature" to 200 degrees. Wait until it gets warm and then loosen the fan assembly and manually feed the PLA down into the hot end extruding chamber until some starts to squirt out the bottom. Then replace the fan assembly carefully to provide tension against the extrusion gear.
- To remove items from the bed, use the chisel
Last edited by Ed at 02:46pm on 10th of July 2026